
Merge Guest Lists and Print Conference Name Badges the Easy Way

We’ve all been there: it’s the night before the event, the guest list is still changing, and you’re staring at a spreadsheet wondering how you’ll print 300 badges before sunrise.
Deep breath. This guide shows you how to clean your guest list and merge it into badge artwork using Canva, Microsoft Word, or Adobe InDesign. If halfway through you decide you’d rather skip the drama, have a look at the one-step Terra Tag option.
1) Prepare your guest list (Excel or Google Sheets)
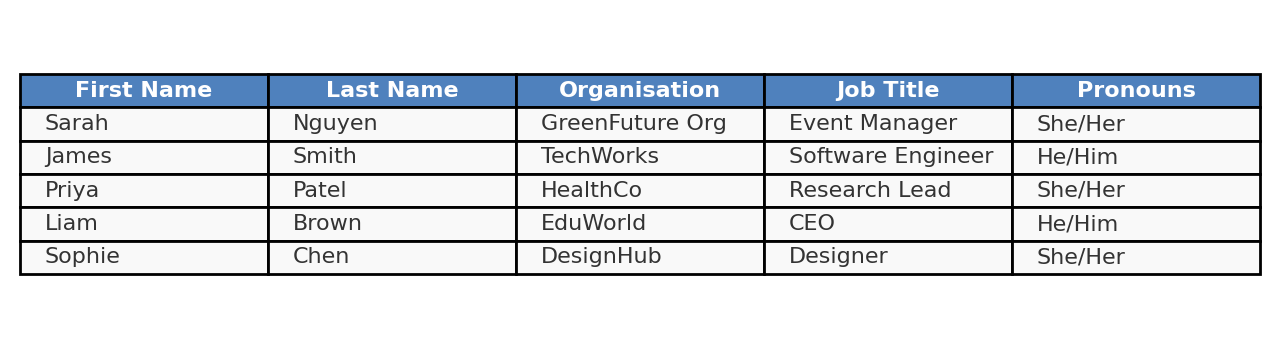
Create a clean, single source of truth.
Columns:
A: First Name
B: Last Name
C: Organisation
D: Job Title (optional)
Add Pronouns or other fields if needed
Fix spelling and capitalisation, remove duplicates and extra spaces.
Save as: CSV (Comma Delimited). Not CSV UTF-8, not TSV. The merge will print exactly what’s in the CSV, so accuracy matters.
Microsoft’s mail-merge docs recommend preparing structured columns and a clean data source for best results.
👉 Pro tip: Always add 5–10 blank badges. Use Avery Eco Labels for last-minute VIPs so every guest name still looks professional (no one feels like a “marker-pen afterthought”).
2. Choose Your Tool
Choose the path that suits your team and timeline:
Canva: visual, quick, great if you’ve built the badge in Canva already. Uses Bulk Create to merge CSV data into a design.
Word: familiar and reliable for office workflows via Mail Merge on the Mailings tab.
InDesign: the most control and robustness at scale via Data Merge.
3. Using Canva to Merge a Guest List
Open your badge template or download our free templates in Canva.
In the editor’s left panel, open Apps, choose Bulk Create.
Upload your CSV.
Add text boxes for fields (First Name, Last Name, Organisation…) and map each to the matching CSV column.
Click Continue and Generate designs. Review a few records.
Export from Canva for print
Share → Download → PDF Print (300 dpi).
Leave bleed/crops off.
CMYK is fine; high-contrast designs print best.
👉 Free Resource: How to Create Conference Name Badges in Canva That Don’t Suck
4. Using Word to Merge a Guest List
Open your badge template or download our free template in Word.
Go to Mailings → Start Mail Merge (Labels or Letters both work for badges).
Select Recipients → Use Existing List, choose your CSV.
Insert Merge Field for First Name, Last Name, etc., into the right spots on the badge.
Preview Results to check a few records.
Finish & Merge → Edit Individual Documents to generate a merged document with all badges.
File → Save As → PDF. Check page size matches your badge layout.
👉 Free resource: How to Create Custom Name Badges in Word (The Stress-Free Guide + Free Templates)

5. Using InDesign for Data Merge
Open your badge layout in InDesign.
Window → Utilities → Data Merge to open the panel.
Panel menu → Select Data Source …, choose your CSV.
Insert data placeholders (drag fields into text frames).
Click Preview to flip through a few records and check overflow.
Create Merged Document when ready.
Export from InDesign for print
File → Export → Adobe PDF (Print).
Preset High Quality Print.
Marks & Bleeds: leave crop/bleed off and set bleed/slug to 0 mm.
Export front and back as separate PDFs if designed separately.
👉 Free resource: Adobe Help Center
6) Design rules that make badges work (front and back)
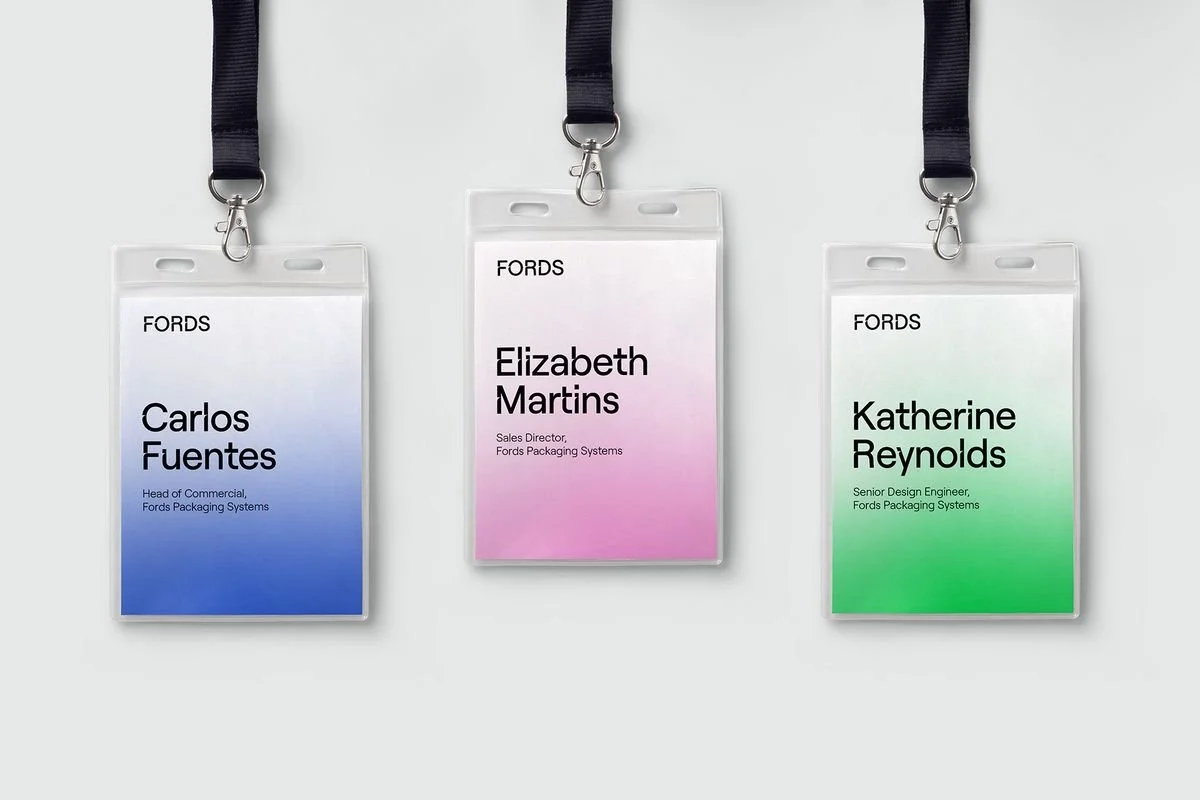
Front — first name must shout
First name is the hero. Use 36–48 pt, bold, clean sans-serif (e.g., Montserrat, Arial, Helvetica).
Last name, job title, organisation are smaller.
Event logo can live at the top; sponsor logo belongs at the bottom; neither should upstage the person.
Leave 1.5 cm from the top for lanyard holes.
Use high contrast. Dark text on a light background is your safest bet.
Backgrounds & colour
Light backgrounds with spot colour accents are ideal.
If using dark backrounds, ensure the contrast is high for readability.
Branded patterns are fine if they’re subtle and don’t fight the name.
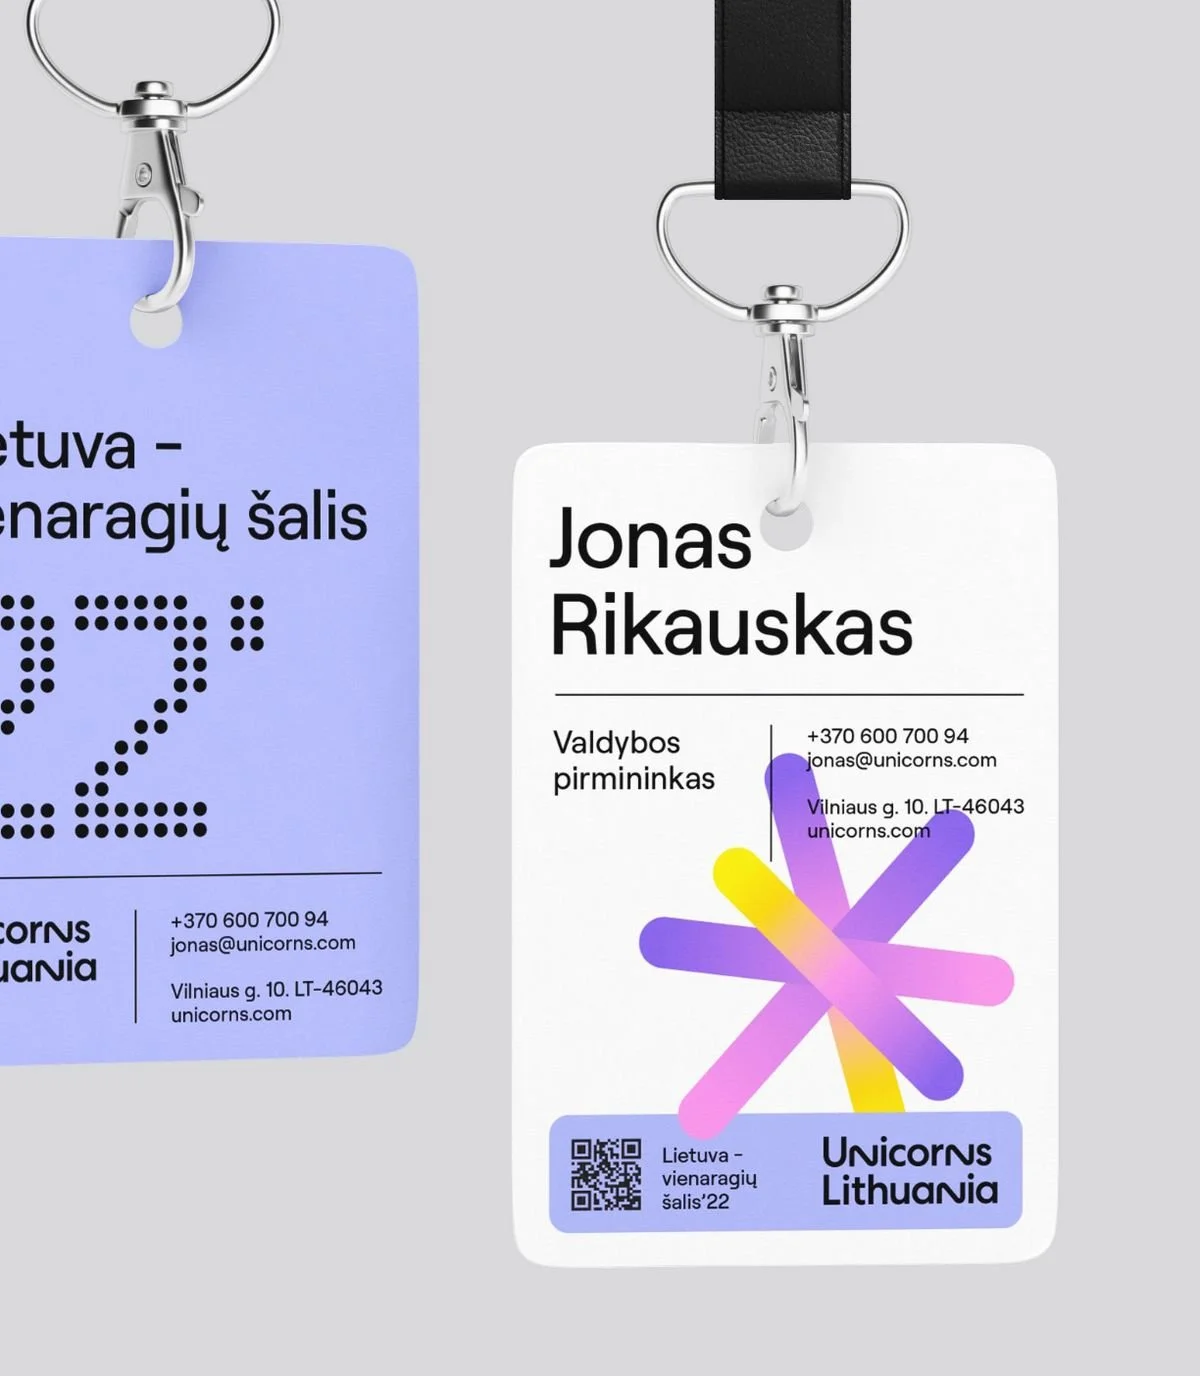
Back — keep it useful and simple
QR code to Agenda or evetn information = 2.5 cm square minimum. Test scan on a printed draft.
Disposal guidance and location of recycling stations.
Optional small sponsor logos in the bottom corners.
Keep a white background, margins 2 cm top, 0.5 cm sides/bottom.

6. The Biggest Badge Mistakes We See (and How to Avoid Them)
After thousands of badges, these are the errors that keep repeating:
Tiny guest names – unreadable at more than a metre. A badge has one job: to enable networking. Make names clear.
Over-designed fronts – full-colour floods and jazzy graphics that bury the name. Design like Apple - keep it clean.
QR codes too small – if it won’t scan, it’s useless. Minimum 2.3–2.5 cm.
Back overload – Keep it simple: QR + disposal instructions.
👉 Our advice: keep designs simple, bold, and functional. The person wearing the badge is the star.
8. The Badge Test
Print one. Hold it at arm’s length. Step back 2–3 metres.
Can you read the first name instantly?
Does it pass the blink test (name pops first, not a logo)?
Does it feel balanced and uncluttered?
If yes, you’re ready. 🎉

9. Skip the Chaos — Terra Tag Does It For You
Yes, you can merge your guest list yourself. But if you’d rather skip the stress:
We take your spreadsheet (CSV).
We merge every guest name.
We print on sustainable seed or recycled paper.
We assemble eco-lanyards.
We pack badges in guest-list order for smooth registration.
👉 One vendor. One box. No last-minute meltdowns.
And the best part? Every badge is plantable, recyclable, and zero-landfill.
Guest list merges don’t have to end in chaos. With a clean CSV, Canva or Word’s merge tools, and a few design rules, you can produce sharp, professional badges.